Search

Showing posts with label DIY. Show all posts

Tuesday, May 26, 2015

Easy Curb Appeal Ideas for Summer

I know it is "technically" a few weeks away, but I think it is safe to say that SUMMER IS HERE in the Pacific Northwest! Now is a great time to get outdoors, finish those projects you have been waiting on, and add a slice of summer to your home's curb appeal.


Main tasks to enhance curb appeal:

  • Plants and landscaping- trim up those overgrown plants, refresh the ones that made it through winter, and plant new flowers/shrubs in the yard or in planters.
  • Clean exterior- rent or borrow a power washer (if you do not own one) and scrub down the sides of your home. You will be amazed at the difference! Click here for a tutorial 
  • Decor- Add a potted plant, welcome sign, decorations or a wreath to your front door to create an inviting atmosphere.
  • Fertilize- Lay down some fertilizer at the beginning of summer to enjoy green grass all season.
  • Fix any small projects in need of attention- for example: clean your gutters, fix any broken fixtures, change lightbulbs that have been burnt out, etc.

Interesting ways to enhance curb appeal:

  • Get funky! Take recycled materials and craft them into garden decorations (don't go overboard, but do have some fun)
  • Paint your front door- a recent study showed that painting your front door a unique color will not only add curb appeal, but will make your home stand out in a beautiful way. 


  • Yard Sales- see what you can find at local yard sales to add some frugal yet tasteful decor to your porch or garden.

Enjoy the summer- get your green thumb, tool belt, and your paintbrush ready! 


*And as always, contact me for more home advice or Real Estate assistance*

Saturday, January 10, 2015

Monday, December 22, 2014

How to Keep Your Old Home Warm for the Winter


The holidays are a time to cozy up by the fire, have family over, decorate with soft glowing lights, fill the house with the smell of something roasting in the oven, and appreciate the things that surround us.

UNLESS WE NEED TO BE CAREFUL ABOUT OUR UTILITY BILL...

Do you have an older home that seems impossible to keep the heat in? Here are some easy winterizing tips we have learned to use, that have saved us tons! We are now able to enjoy our farmhouse Christmas without the underlying stress of cost.

1. Is all the heat going upstairs? Hang a blanket to stop the draft at the bottom or top of the stairs. It looks a bit silly at first, but it keeps the house warm with little effort. We use a thick flannel sheet- it does the trick and looks a little festive for the winter season.

2. Everyone suggests it, because it works: winterize those windows! Especially with older homes, heat escapes and cold parades in through single pane windows. Even upgraded windows should still be winterized. Stores like Home Depot sell window kits to accomplish this, but it can also be done with bubble wrap/tape.

3. Diminish that door draft. Many older homes have mysterious areas that bring in a draft from outside, especially under doors. Department stores carry "draft stoppers". These can also be made at home using fabric (or socks) and dry beans, or even foam pipe covers.

4. If you have a stove/fireplace, use it to its full potential! We do not yet have a wood stove, but do know that by collecting firewood throughout the year and preparing, you can save hundreds to thousands on your heating costs, while having a HOT home throughout the winter. Make sure to have a fan nearby the stove/fireplace to circulate the warm air through your home. *Always follow safe procedures when using a fireplace/stove, and do not leave unattended.

5. If you have only a thermostat, learn to "work the system". Before we discovered this trick, we would turn the heat off at night, while we were gone, and after the furnace ran for a few hours. It was cold, miserable in the morning, and actually made our heating system work harder than it does now. We are actually saving more money by keeping the thermostat set to about 65 degrees. If the furnace has to heat the home from 30 degrees to 70 degrees, it uses a lot of energy in a little amount of time. It is better to keep the temperature at a medium, and allow the furnace to "touch up" the heat. This, matched with our other techniques, keeps our home warm all day for such a little cost. I was so surprised to see that our last bill was only two digits! ($80.00 compared to $150.00)

6. Winterize your bed. If you do want to save even more, and turn the heat down at night, (we do not turn it off anymore, however, we do turn it down) make your bed an alternative rather than a punishment. Layer it with flannel sheets, a down comforter, and a cotton comforter. During the really cold evenings, add some layers of knit blankets. There are nights where we wake up in a sweat, just from how warm the blankets keep us! The great part about this is that blankets are CHEAP while producing a good outcome.


Good site for DIY Door Drafts: http://www.goodhousekeeping.com/home/crafts/door-draft-stoppers-draft-snakes-460109#slide-14

Window Winterizing Kits: http://www.homedepot.com/s/window+winterizing?NCNI-5


Tuesday, October 21, 2014

Home Supply Thrift Stores: DIY Restoration Meccas


Every homeowner knows it is a big, and sometimes improbable expense to restore an old home. However, if this is done in small steps while finding deals, it can be a fun and definitely less stressful experience.

Especially if you are looking to restore an old home to the specific time period, home supply thrift stores are a great place to find old fixtures and supplies. And at amazingly low cost, you are enabled to stock up and "splurge" during your trip.

We have had a lot of success at these stores. We have come across high quality tile, snap hardwood flooring, old light fixtures, and even old time kitchen décor. Beware: these stores will make you want to remodel your bathroom that weekend; pedestal sinks and cabinets galore!

Several major second hand home supply stores include: Habitat for Humanity, Rebuild, and many religious based organizations. The easiest way to find them in your area is to search online. They vary in name and type by every city.

If you are not close to one of these stores, always keep your eye out on websites like www.craigslist.com or local free/for sale/wanted pages on www.facebook.com . If there are home supply thrift stores a day trip away, I highly suggest driving the truck/van/trailer out and making a day of adventure from the journey.

Linson home, upstairs bedroom #3

Monday, September 29, 2014

Old House Charm... and Mold/Mildew.


I am absolutely in love with our 1910 farmhouse windows. However, there is a lot of upkeep that needs to be done in order to maintain the safety and look of an old home. With old windows comes moisture. This leads to buildup of mold/mildew on window sills, and it can even spread to the wall if not confronted.

It took only a few hours to completely rid every window of traces of mold/mildew, and it was quite an easy process considering how clean it made the house!

What we did:

*Wear facemask AND eye goggles
*Cover nearby furniture and carpet to protect from bleach
*Open doors and windows, and turn on fans

Mix a solution of 1/2 bleach, and 1/2 water in a spray bottle. (Spray bottle allows the solution to hit hard areas, while not putting too much water on your surfaces)

Remove screens from windows (there is a lot of dirt and moisture in window tracks!)

Cover each window sill/moldy spot thoroughly in bleach solution spray. Let sit for about 20 minutes (you may just need a break from all that spraying afterwards anyway!)

Next, go through each room, following the same route as you sprayed. Using a scrub brush, use that elbow grease and a small bucket of dish soap/water to break it loose and get it off the surface. MAKE SURE YOUR MASK IS ON, MOLD CAN BE TOXIC!

After all windows are scrubbed, go through with the bleach bottle and a DRY rag/towel that you don't mind getting bleach stains on. Use the spray on tough spots, and use the rag to wipe off loosened mold.

Discard scrub brush and rag/towel and allow the areas to dry completely before closing the windows again.

**Extra clean bonus: Take your screens and hose down/bleach while the window sills are drying.

By taking the time to bleach and sanitize windows, along with assessing moisture buildup, your old home will never look "OLD" or dingy. Plus, you and your family will be safe/healthy!

We will also be looking at getting our windows resealed.


More info on condensation: http://www.diydoctor.org.uk/projects/condensation.htm

Tuesday, September 16, 2014

Home Sweet Home

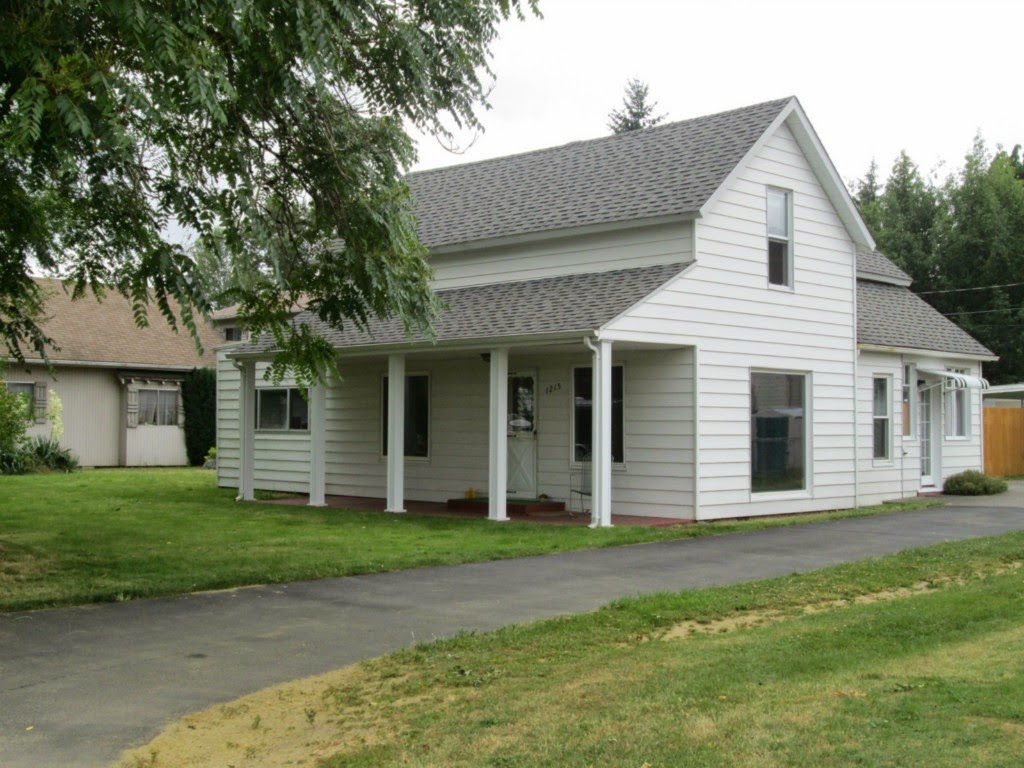
To start things off in this Real Estate blog, I thought I would talk a little bit about my home. My husband and I purchased our first home in 2011. It was a 1910 farmhouse with THE WORKS: white columns, big trees, large windows, two stories...

We had looked at one other house before we decided to put in an offer on "the one". The competition was an older house on about an acre in the woods just outside of town. It was interesting, but there was just nothing "wow" about it, especially in comparison to our 1910 wonder.

Within 30 days of making an offer, we had closed and moved in. It seemed so easy! The only bump in the road was the electric box/breaker. It did not pass inspection, and had to be replaced. Other than that, it was a fast and smooth process. I believe the fact that we were pre-qualified for a specific amount really impacted the ease of our search and close.

One week after we moved in, the pipes clogged up. About $400.00 later, we had it fixed and were back to square one. We love our home, and expect minor problems with a house that age (104 years old), but we definitely learned about the importance of thoroughly checking out a home before it is a done deal.

There are things I wish we had known about buying a home for the first time, but I now am able to use that experience to help others and be prepared for our next purchase.